Showing posts with label gluten-free. Show all posts

Monday, September 14, 2015

Vegetarian or Vegan Stuffed Peppers


I get a lot of requests for Meatless Monday recipes so this is one of my favorites that I love to share!  The meal pictured here is vegetarian because I included Parmesan cheese, but you could absolutely make it vegan by omitting the cheese, or make it with beef should you want to eat meat.  Any way you choose, this recipe is great to clear the fridge and pantry of leftover items! Below is a loose recipe I created hastily during a weeknight. Hope you enjoy!

Ingredients:

Bell Peppers, seeded and sliced in half through the center (it's easier to stuff them this way)
Rice, or rice and beans combo, cooked
1 medium red onion or white onion, diced
2 carrots, diced
1 bag of frozen spinach, thaw it by putting in colander and running warm water over it-then squeeze out water after thawed with your hands
1/4 to 1/2 cup of canned pureed tomatoes 
Parmesan cheese
salt/pepper
cumin
paprika
ground mustard
chili powder

Method:

Cook your rice according to the package.  You could use this...

...which is what I used. This way you get the complete protein combo (not that you need it, but still) of the rice and the beans in addition to the seasonings.  If you are limiting your sodium, you could use just plain basmati rice and the seasonings I listed above.  Either way, cook this first. 

While the rice is cooking, preheat the oven to 350 degrees.  Then, slice the peppers in half through the stem and take out the seeds.  After the peppers are emptied, put them in a large casserole dish and fill the dish with a little bit of veggie stock or carrot juice or tomato juice or anything that can impart flavor into the peppers.  Cover the dish with foil and pop the peppers into the oven for about 20 minutes.  This will make them softer and easier to fill. 

If the rice finishes before you've gotten the veggies cooked and ready just set it aside until you need it!  Same goes for the peppers.  Next, pour a little canola oil in a pan (or you can skip it if you want to avoid oil) and add the onions and carrots.  Saute them for about 5 minutes on medium high heat until they are softened a bit.    (Add beef here and cook until browned if you are making with meat.)  Then, add any seasonings you want, the spinach and the tomato puree.  Stir well and cook for a minute or two.  Then add rice and mix well.  The mixture should be the consistency you'd want it to be inside the peppers! If not, add wine or more tomato puree until it is.  Then add Parmesan cheese to taste.

Once you've pulled the empty peppers out of the oven it's time to stuff them.  Take your finished rice mixture and stuff it in there.  Then sprinkle a little more cheese on top (optional).  Throw the peppers back in the oven uncovered for about 30 mins, then serve! 

This is a great make-ahead meal as you could complete all the steps except the final one, ahead of time! Hope you enjoy :).

Friday, February 14, 2014

Clear Out Your Cupboards Chili!

Simple Pantry Chili!
As we all continue to hibernate (or many of us anyway), I thought it might be nice to post a standard chili recipe (there is a great butternut squash/kale recipe in a recent previous post) that you can make without leaving your home AND that's packed with IRON, FIBER, PROTEIN, CALCIUM and tons of other vitamins and minerals.  It's also made in one pot, with about 5 minutes of prep and little babysitting! I was able to fold the laundry while this cooked.  And if you still needed another reason to make this-it tastes even better then next day! 

Ingredients (and remember use what's in your pantry-substitute where necessary)

1 onion, diced
2 small sweet peppers, diced
1 can unsalted kidney beans (drained and rinsed)
1 can unsalted black beans (drained and rinsed)
1 can unsalted navy beans (drained and rinsed)
1 14 oz can of organic crushed tomatoes (i used fire roasted)
1 lb ground organic beef (can be left out-i just had some on hand)
2 Tbsp chili powder
pinch of cinnamon
pinch of cumin
pinch of garlic powder

Method

Heat a little olive oil in a large saucepan (like a tsp) and add the onions, peppers and spices.  Saute for a few minutes until translucent, then add beef.  Saute on medium until browned.  Add beans and can of tomatoes and bring to a boil.  Reduce heat to low and simmer for 20-30 mins covered. DONE!

I added hand-grated cheddar cheese because my son loves it, but feel free to leave out both the meat and cheese for a vegan delight! You can add avocado instead! 

Hope you enjoy this great weeknight meal!

Use the leftovers to make fantastic breakfast burritos or as a topper for nachos at snack time!

Saturday, September 28, 2013

Surprisingly Awesome Cauliflower Salad


I got a HUGE head of cauliflower in my CSA (community supported agriculture) this week and was getting sick of just adding it to mashed potatoes.  So I looked for a new way to incorporate this cancer-fighting cruciferous vegetable into my daily diet!  Below is the inexpensive, easy way to do so.  I know many are afraid of raw cauliflower, but it really is an amazing, balanced salad! Give it a try!

Recipe source: epicurious.com

Ingredients

1/3 cup olive oil
1 tsp fresh rosemary, minced
2 Tbsp FRESH lemon juice
1 Tbsp red wine vinegar
2 1/2 tsp lemon zest
salt and pepper
1 head cauliflower, trimmed and cut into small florets
1 (15 oz) can of unsalted navy beans, drained and rinsed
2 heads of Belgian endive, trimmed, halved lengthwise and then thinly sliced crosswise
1 Tbsp FRESH chives, chopped
2 tsp FRESH parsley, chopped
1/2 cup crumbled feta cheese (3 oz)

Directions

Infuse the olive oil with the rosemary by stirring it over medium heat for about a minute or until fragrant. Set aside and let cool.

Whisk lemon juice and zest, vinegar and salt and pepper in a bowl and set aside.

Combine cauliflower, beans, endive, chives, parsley, and rosemary oil in a bowl and toss.  Then mix in the cheese and toss again.  Then add the lemon mixture and toss one last time. Serve.

Cauliflower Stats! (sourced from whfoods.com, one of my fav sites)

Ignoring the amazing nutrition of the other ingredients in this salad, ie protein from beans and vitamins from endive, cauliflower (especially raw) has a ton to offer you besides fiber to keep you regular.  Here's a look:

vitamin C 85% of your daily value!
vitamin K 20%
folate 15%
choline 11%
vitamin b6 10%
potassium 9%

And for very few calories! Cauliflower in and of itself only has 26 calories!! Wow! Enjoy!

Monday, September 10, 2012

Hearty Butternut Squash Chili

'Tis the season for campfires, apple cider and hearty, warm dishes that fill your belly on a cool night. That tasty bite up there is my latest creation, a yummy use of butternut squash as a one-pot dinner. Super simple, seasonal and inexpensive. Here's what you need:

Ingredients

olive oil
1 butternut squash, peeled and cubed
1 red onion, diced
3 cloves garlic, minced
2 Tbsp chili powder
3 tsp cumin
Pinch red pepper flakes
Pinch of cinnamon
3 cans navy or other white beans, drained and rinsed
2.5 cups low sodium veggie broth
1 14 oz can of diced fire roasted tomatoes
1 small bunch of swiss chard, rinsed and roughly chopped

I also have sage that I occassionally add in.


Preparation

Heat about 2 Tbsps oil in a large saucepan. Add onions and garlic and saute until golden for about 7 minutes on medium high heat.

Add squash and spices and cook stirring constantly for about 2 minutes.

Stir in beans, stock and tomatoes (oh i added a bay leaf too). Bring to a boil, then reduce heat to simmer for 25 minutes. Uncovered.

Add the chard and simmer another 8 minutes. 

Season with some fresh ground pepper and serve with some crusty bread!

You could also add meat and or cheese to this but I dont think it needs either so why add the fat and cholesterol?! Enjoy!

Sunday, July 3, 2011

Not Your Average Side Dish

I've been away for a while dealing with some life craziness but I promise to make more posts more consistently when we get into our new house! Meanwhile, here's one I thought you would enjoy for the 4th of July weekend.


Instead of just bringing a standard fruit salad as your side dish to pass, how about wowing them with some extra pop that will leave people wondering, "wow, what made that so good?"


This salad can be used as a side dish or dessert for any meal, but it also makes FABULOUS leftovers to use for breakfast. The best part is that if you use local, season fruit (besides the honeydew) it will cost you almost nothing to make! Here's the recipe:

Ingredients

2 cups, papaya, chopped
2 cups, cantaloupe, chopped
1 cup blueberries
1 cup strawberries, sliced
2 kiwis, peeled and chopped
1 banana, sliced

For the dressing:

1 cup honeydew, chopped
2 to 3 tablespoons fresh lemon, lime or any citrus you like (I LOVE blood orange juice in this)
1 to 2 teaspoons poppy seeds
2 to 3 dates, pitted (use local honey or agave here if you don't dig dates!)
pinch of ground cinnamon
pinch of ground ginger (don't skimp on this, it is soooo worth it and yummy)

Method


Chop all the fruit for fruit salad and put in a large serving bowl.


In a blender, add the dressing ingredients and puree until smooth. Pour over fruit and toss gentley. Serve. Can also be chilled for added flavor and then served.


***KID TIP***


This can also be made into a fun family friendly dish! Instead of putting the fruit in a bowl, ask your kids to put it on wooden skewers. Then they can dip the fruit in the dressing.


Just as fun as chicken nuggets without the grossness.

HAPPY INDEPENDENCE DAY!!

Wednesday, May 18, 2011

A Healthy Drink for Body and Mind

Thanks to the blogger meltdown this week, it took me a little while to post this but wanted to make sure you all got the recipe because it's amazing!


This drink is a non-alcoholic, vegan, gluten-free, refreshing summer "spritzer." being pregnant, it not only quenches my thirst and gives me something other than water to drink (because I don't drink juices unless I make them at home), but it also soothes my unstable stomach and puts my mind at ease!


It will literally take you 2 minutes to make. Here you go:

Ingredients:

ginger, a piece fresh from the root
1 lime
1 bottle of sparkling water
ice

Method:


Peel a piece of fresh ginger that is the size of a penny or nickel. It is easiest and least wasteful to peel ginger while holding it in your handing and using a spoon to remove the skin. Once the ginger is peeled, use a microplane or small grater to grate it into a glass. Use a little at first, because you can taste it and add more if necessary.


Then cut the lime in half and slice one round off and put it in the glass. Squeeze the lime juice into the glass. Add ice. Pour in sparkling water and you are good to go!


***Note: I like to also add a little sweetness to this. You could add a dash of coconut water or milk to add a sweetness or even peach nectar!***


Alternative drink


Another great non-alcoholic, vegan, gluten-free summer drink that I just learned how to make is a homemade pina colada! All you have to do is blend coconut milk (from the can, unsweetened) with pineapple and ice. AMAZING!!


Enjoy these yummy, refreshing summer drinks. Hopefully they will inspire mother nature to bring us summer weather!

Monday, April 25, 2011

For Those Craving Chocolate!

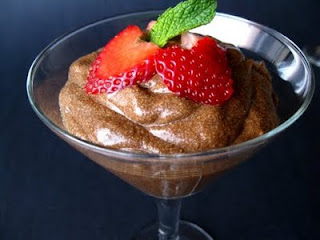
Here is the recipe for my VEGAN CHOCOLATE MOUSSE. Yes, you read correctly. It is chocolate mousse that is healthy (and not the pretend kind of healthy where they make it "fat free" and there's all sorts of crap in it), inexpensive and easy. Here you go!


Ingredients


2 ripe (we're talking very soft) avocados (just trust me)


2 to 3 tablespoons of raw cacao or cocoa powder


vegan chocolate chips if you dare!


1 teaspoon of vanilla extract


1 dash of honey (you can leave this out if you wish)


some sliced strawberries for topping


shredded coconut for topping


Method


Peel and pit avocados and put in blender or food processor. Add the rest of the ingredients, except for the toppings, and process until smooth and chocolatey. Top with strawberries or other fresh fruit and shredded coconut. Serve.


OMG it's amazing! You'd never believe it! And the whole time you are getting the healthy fats your body needs from the avocado without the cholesterol-packed, fattening dairy products. Yay for you!

Tuesday, March 29, 2011

Quick Quinoa Tacos!


First, what is Quinoa (pronounced KEEN-wah) and why should you eat it?


Contrary to popular belief-you can get all your protein from plant sources, including this complete source, found in the grain family, although it is a seed. A complete protein means the food contains the 9 essential amino acids we can't make in our bodies, in proper proportion for easy absorption. Most people think you need to get all your amino acids from one source and that that source should be meat. However, quinoa has a similar amino acid profile-meaning it is a complete protein packed with what you need to build muscle, etc. Also, on a side note, you don't need to get all your amino acids (the building blocks of protein) from one source. Our body is built to put varying aminos together to build things-so diversifying the sources in your diet is no less nutritious than getting them all from one food.


Quinoa was eaten by the Incans back in the day before battle. Yes, men, warriors ate it. So you can feel manly without the meat. This food will give you long-lasting energy throughout the day, stable blood sugar and protein to build muscle without saturated fat, casein (a known cancer-causing animal protein), excess sodium or sugar. It is also GLUTEN-FREE!!


And guess what-it's cheap, easy and yummy!! It only took me 1 hour to prep, cook, eat and cleanup after this meal. Doesn't get any easier.


Here's how I prepared it:


Quick Quinoa Tacos


Ingredients Serves 2 to 4


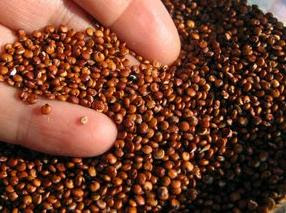
1/2 cup red quinoa (uncooked)

1 cup low-sodium vegetable stock

1/2 yellow onion, chopped

1/2 red pepper, chopped

pinch of cayenne

pinch of cumin

3 cloves garlic, minced

your favorite guacamole (or make your own by just smashing up some avocados)

your favorite salsa

1 can low-sodium black beans

1 lime

1 package whole wheat flour tortillas


Method


Saute the onion, pepper, garlic and spices in a sauce pan until translucent and cooked. About 3 to 5 minutes on medium high heat. Add the 1/2 cup of quinoa and toast, while stirring constantly for about a minute. Then add the broth, bring to a boil, cover, reduce to a simmer and cook for about 20 minutes stirring occassionally.


While the quinoa is cooking, open the black beans, drain and rinse. Heat if you prefer. Chop tomatoes and heat your tortillas if you want as well. I also used this time to steam some broccoli for the side to this dish. (To do that just buy some broccoli, break off the little stems into a colander, put the colander in a sauce pan that you can fill with about an inch of water without having it touch, cover and steam for about 12 minutes).


Then, once the quinoa mixture is done, build your tacos! Put the quinoa, beans, guacamole, salsa, lime and tomatoes on your tortilla and enjoy!

Wednesday, March 23, 2011

Random Recipe to Love!

I thought you might need another vegan, gluten-free soup to try this week so I wanted to share this one from the Vegetarian Times. It's super easy to make, cheap and only gets better overnight. It also is PACKED with protein, calcium, beta carotene and so many other yummy vitamins and minerals. Let me know what you think or if you added any of your own twists!
Ingredients
1 tablespoon olive oil (or if you are eliminating oil from your diet, just use water)
1 white onion, chopped (about 1 cup)
3 cups kale, chopped (I used a whole head of lacinato or dino kale)
1 yam, diced (I left the skin on for added nutrients)
1 tablespoon smoked paprika (or just use regular if that's what you have)
1 tablespoon curry powder
1 bay leaf
4 cups low-sodium vegetable broth
2 15.5oz cans of no-salt-added Northern or Navy Beans
2 tablespoons red wine vinegar
Method
First, heat the oil or water in a saucepan over medium heat. Add onion and cook on medium high heat for 8 minutes, or until lightly caramelized, stirring often.
Then add the kale and cook for about 4 minutes or until it's wilted. Stir in yam, paprika, curry powder and bay leaf, cooking for 1 minute more.
Add broth, and bring to a boil. Then reduce heat to medium-low and cook for 30 minutes or until kale and yam are tender. Puree 1 cup of the beans with 3/4 cup of beans in a blender or food processor. Add puree and the rest of the beans to the soup and simmer for about 10 minutes. Then add the vinegar and serve!
Yum! This soup has:

165 calories, 9g protein, 2.5g fat, 0mg cholesterol, 300mg sodium (it says more on the veggie times website bkz they use regular beans!), 10g fiber

Enjoy!

Monday, March 21, 2011

Meatless Monday-What's for Dinner?

Meatless Monday is a great tradition to adopt if you are looking to improve your family's health. It is potentially the one-and-only day all week where you don't eat meat. The goal on this day is to pack your body with nutrient-rich foods such as vegetables, beans, whole grains and fruit, while leaving out the artery-clogging cholesterol, high-blood-pressure-making sodium, and obesity-causing saturated fats that are in meats, cheeses and processed foods. Don't get me wrong though, only one day of eating vegetables a week is not nearly enough to see the cholesterol-lowering, pound-shedding effects this eating style can provide you BUT, it is a great start and is worth every mouth-watering moment!
The key here is to make good choices for dinner on this night. Choosing fake meats or processed foods as an alternative to meat is not beneficial because they still have the fat, sodium and then sugar that you should avoid. Instead, try easy recipes using real ingredients to wow your tastebuds and fill you up. Try this recipe below-it's one of my favorites because it's quick, tasty and stays in the fridge for a few days for lunches! It's also inexpensive and you can totally multitask while it's cooking! Enjoy!


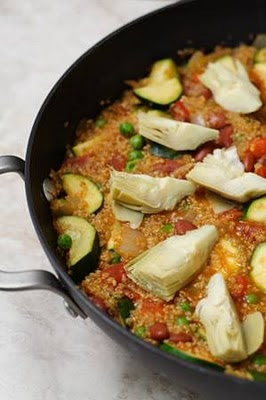
Veggie Paella

Ingredients (Vegan, Serves 6)

1 onion, chopped

3 garlic cloves, minced

1.5 cups quinoa (uncooked, use red quinoa for a nuttier, more savory flavor)

1/4 teaspoon saffron, crushed (this is what makes any paella great!)

2 teaspoons Spanish smoked paprika

1/2 teaspoon ground cumin

dash cayenne

1 14oz can of diced tomatoes (no-salt added, very important)

1 red or yellow bell pepper, chopped

1 14oz can of red kidney beans (no-salt added), rinsed and drained

2 3/4 to 3 cups of low-sodium vegetable broth

2 medium zucchini, halved lengthwise and sliced

1 cup frozen peas

1 can artichoke hearts, rinsed and cut into quarters

Method

Put the quinoa into a large bowl and cover with water, stirring well to wash the grain. Pour off the water (through a seive) and repeat. Leave the drained quinoa to the side for a second.

Saute the onion and garlic in a deep non-stick pan with a little water (in lieu of olive oil) until soft, about 2 minutes. Add the quinoa and saffron, stirring constantly for 2 minutes. Add paprika, cumin, cayenne, tomatoes, peppers, beans and 2 3/4 cups of vegetable broth to the pan. Bring to a boil and reduce heat to a low simmer. Cook covered for 15 minutes.

After 15 minutes, check to see if more broth is needed. You'll know because the mixture will look dry instead of vibrant and moist. If dry add 1/4 cup broth. Now place the zucchini on top of the quinoa and re-cover. Cook for about 5 minutes more until the quinoa is done. You'll know because it will turn translucent-ish and will have little spiral-like tails coming from each seed. When done, remove the cover, stir in the peas and cook uncovered for about 5 minutes. Arrange the artichoke hearts on the top and serve!

Nutrition Facts PER SERVING: 288 calories, 3g total fat, 13g protein, 0mg cholesterol, 150mg sodium, 10g fiber

Monday, February 21, 2011

When You're Hungry for a Snack...

On a day where you don't feel like leaving the house (in my case because of my snow) and you are having people over, or you just plain need a healthy snack, you can still create this pretty, yummy and nutritious treat for cheap!

I also bring this to parties a lot because it looks a whole lot better than just bringing a plate of veggies with some hummus. The picture to the left is actually from one of my Healthy Eating Supper Clubs that I hosted at Whole Foods Market in Fort Collins, CO. I served this, to rave reviews, as an appetizer. The recipe is as follows:

Ingredients

1 english cucumber
1 package of oil-free roasted red pepper hummus (or if you can't find it, make it yourself with recipe below!)
1 cup of raw cashews (toasted if you are feeling ambitious!)

NO JOKE THAT'S IT! I'll tell you how to assemble below and will also give you my recipe for homemade hummus that's to die for, in case you want to keep the "homemade and healthy" thing going on. I highly encourage this because then you can make your hummus without oil.
Method

Wash the english cucumber and cut off the ends. Then peel the cucumber so the skin looks like stripes! Slice into 1/2 or 1/4 inch rounds and spread on a plate. Spoon a heap of roasted red pepper hummus on top of the cucumber slice and garnish with a cashew. Serve! This yummy dish is fresh, healthy and balanced with all the components that make a dish taste great! Try for yourself!

WHY skip the oil?


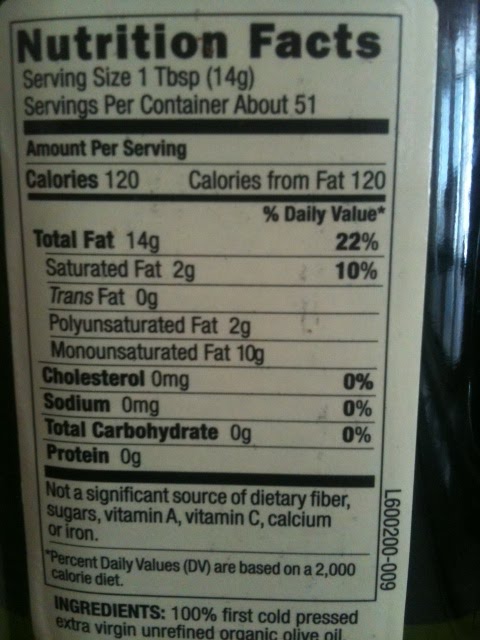
Because if you look at the label here for Spectrum Olive Oil (it will be pretty much the same label for any olive oil you get), you'll notice that the serving size is only 1 TABLESPOON, and that in that one tablespoon there are 120 calories-all from fat!!! So if you are adding, say 1/4 cup of olive oil to your hummus-that's about 4 tablespoons equalling 480 calories all from fat!!! And you don't even feel full from those calories!


People will argue back and forth about the potential health benefits of olive oil. I'm not here to talk about that. Whatever you believe-fine. HOWEVER-no one can disupte that olive oil is 100% fat and if you are trying to lose weight or be healthier, it is not ideal because again you will be getting calories that won't fill you up. Instead I recommend ditching the calories and getting your fats from whole plant sources (not the extracted ones in this case) to fill you up with nutrients, fiber and the like. You'll see a real difference once you stop cooking like Rachael Ray and Paula Deen. Really! It can be simple if you let it be.

Homemade and Healthy Hummus (no oil in this recipe!)


Ingredients

1 can no-salt-added garbanzo beans, drained and rinsed-some of the liquid reserved
lemon juice (from a real lemon, not that funny lemon-shaped squeezie bottle)
1 tbsp horseradish (the kind from the store that doesn't have preservatives)
2 tbsp tahini (which is just crushed sesame seeds-good, healthy fat)
fresh ground pepper
dash of low sodium tamari
dash of cayenne
dash of cumin
dash of paprika
dash of coriander
(add a few roasted red peppers from a jar if you are making the hummus for the dish above)

Directions

Blend all ingredients to taste. You can used the reserved bean liquid to thin out the mixture with flavor (to replace the oil). Remember, taste along the way. Add more spice if it needs it. Enjoy!

Saturday, February 19, 2011

How About Some Vegan Stuffed Shells?


This recipes comes from my need for comfort food! Especially on a day like today in Upstate New York where it's snowy and gray-you really want to feel the warmth in your home, belly and heart. So why should you have to sacrifice your health and waistline?!

I came up with this Vegan Stuffed Shell recipe to satisfy that particular issue. Hope you enjoy and would love to hear what you think!

Ingredients

For the shells:
1 box of large whole wheat pasta shells or whole wheat lasagna noodles if you can't find the shells or brown rice lasagna noodles if you are gluten-free
2 cups macedemia nuts
2 cups cashews
2 Tbsp nutritional yeast (you can find this in the bulk section of your grocery store and it is just yeast but looks and tastes like cheese when added to things!)
1 can of artichoke hearts, drained and diced
dried basil
dried oregano
black pepper

For the sauce (OR buy a low-sodium sauce instead):
2 or 3 cans of no-salt-added diced tomatoes
red wine-something you like
onions, diced
garlic, minced
red pepper flakes
dried basil

Directions

**Do ahead**
Put macademia nuts in a bowl filled with water about an inch above the top of the nuts and let soak overnight (before you go to bed) or for 8 hours (while you are at work).

Put cashews in a separate bowl filled with water about an inch above the top of the nuts and let soak overnight or for 8 hours.

**At Supper Time**
After the nuts have been soaked, drain them and blend them in a high powered blender separately. The macademia nuts should resemble a ricotta cheese when blended. Add water or lemon juice to keep your blender from overheating and to get the right consistency. Then once complete, throw in a bowl. Do the same for the cashews and throw in the same bowl.

Now add the basil, oregano, pepper, yeast and artichokes until well mixed. I didn't put amounts for the spices because you should taste it to see what you like. Add small amounts at first, mix, then taste. If it doesn't taste flavorful yet, add more spice because it certain won't change while baking!!

Then cook the shells or noodles in a pot of water until al dente, about 4 to 6 minutes. Drain, separate and lay flat to cool. Stuff with the "cheese" mixture and set aside. (If you are using lasagna noodles just dollup a little "cheese" in the middle of the noodle and roll it up!)

Preheat oven to 350 degrees.

To make the sauce, heat your onions in a hot stainless steel skilled. You don't need oil if the pan is hot enough because the onions will release their own juices! Saute for about 2 minutes, then add the garlic, red pepper flakes, basil and other spices you might like! Saute for 1 minute and add a bit of red wine to deglaze the pan. Then add the tomatoes and simmer for about 10 to 15 minutes until the sauce thickens and reduces.

Spread a little of the sauce to coat the bottom of a cassorole dish. Then add the stuffed shells (or the rolls) to the dish. Then coat with another layer of sauce, making sure each shell is covered. Throw in the oven for about 40 minutes and serve. YUM!